Cameras
Breeze Booth supports the internal cameras of your device (eg, front and rear facing cameras on your iPad or iPhone) as well as Canon DSLR and Mirrorless cameras.
In this Guide
Using the Internal Cameras
By default, the internal camera of your device is enabled and it is set to an automatic exposure and white balance mode. You can cycle between the available cameras by tapping the Camera button. If recording video, you will also see the available frame rate for the chosen camera.

You can adjust the exposure compensation (make the image brighter or darker) by adjusting the slider left or right. Contrast, Saturation and Vibrance can all be adjusted via their respective sliders.
You can manually adjust the shutter speed by enabling the Auto exposure compensation toggle and the desired shutter speed by adjusting the slider.
White balance is set to auto by default, but can be manually adjust by toggling the option on. You can then use the slider to make your image warmer (slide right) or cooler (slide left).
You can digitally zoom the live view to crop it. Keeping in mind you will sacrifice some resolution when zooming.
Using a DSLR / Mirrorless Camera
Breeze Booth for iPad can use a Canon camera instead of the iPad's built-in camera. This gives better image quality when taking photos and allows the use of flash for better lighting. The external camera can be used to take photos and to capture boomerang GIFs and videos.
Please note that the camera needs a memory card if it is to be used for video capture. A memory card is not required if shooting still images or burst GIFs.
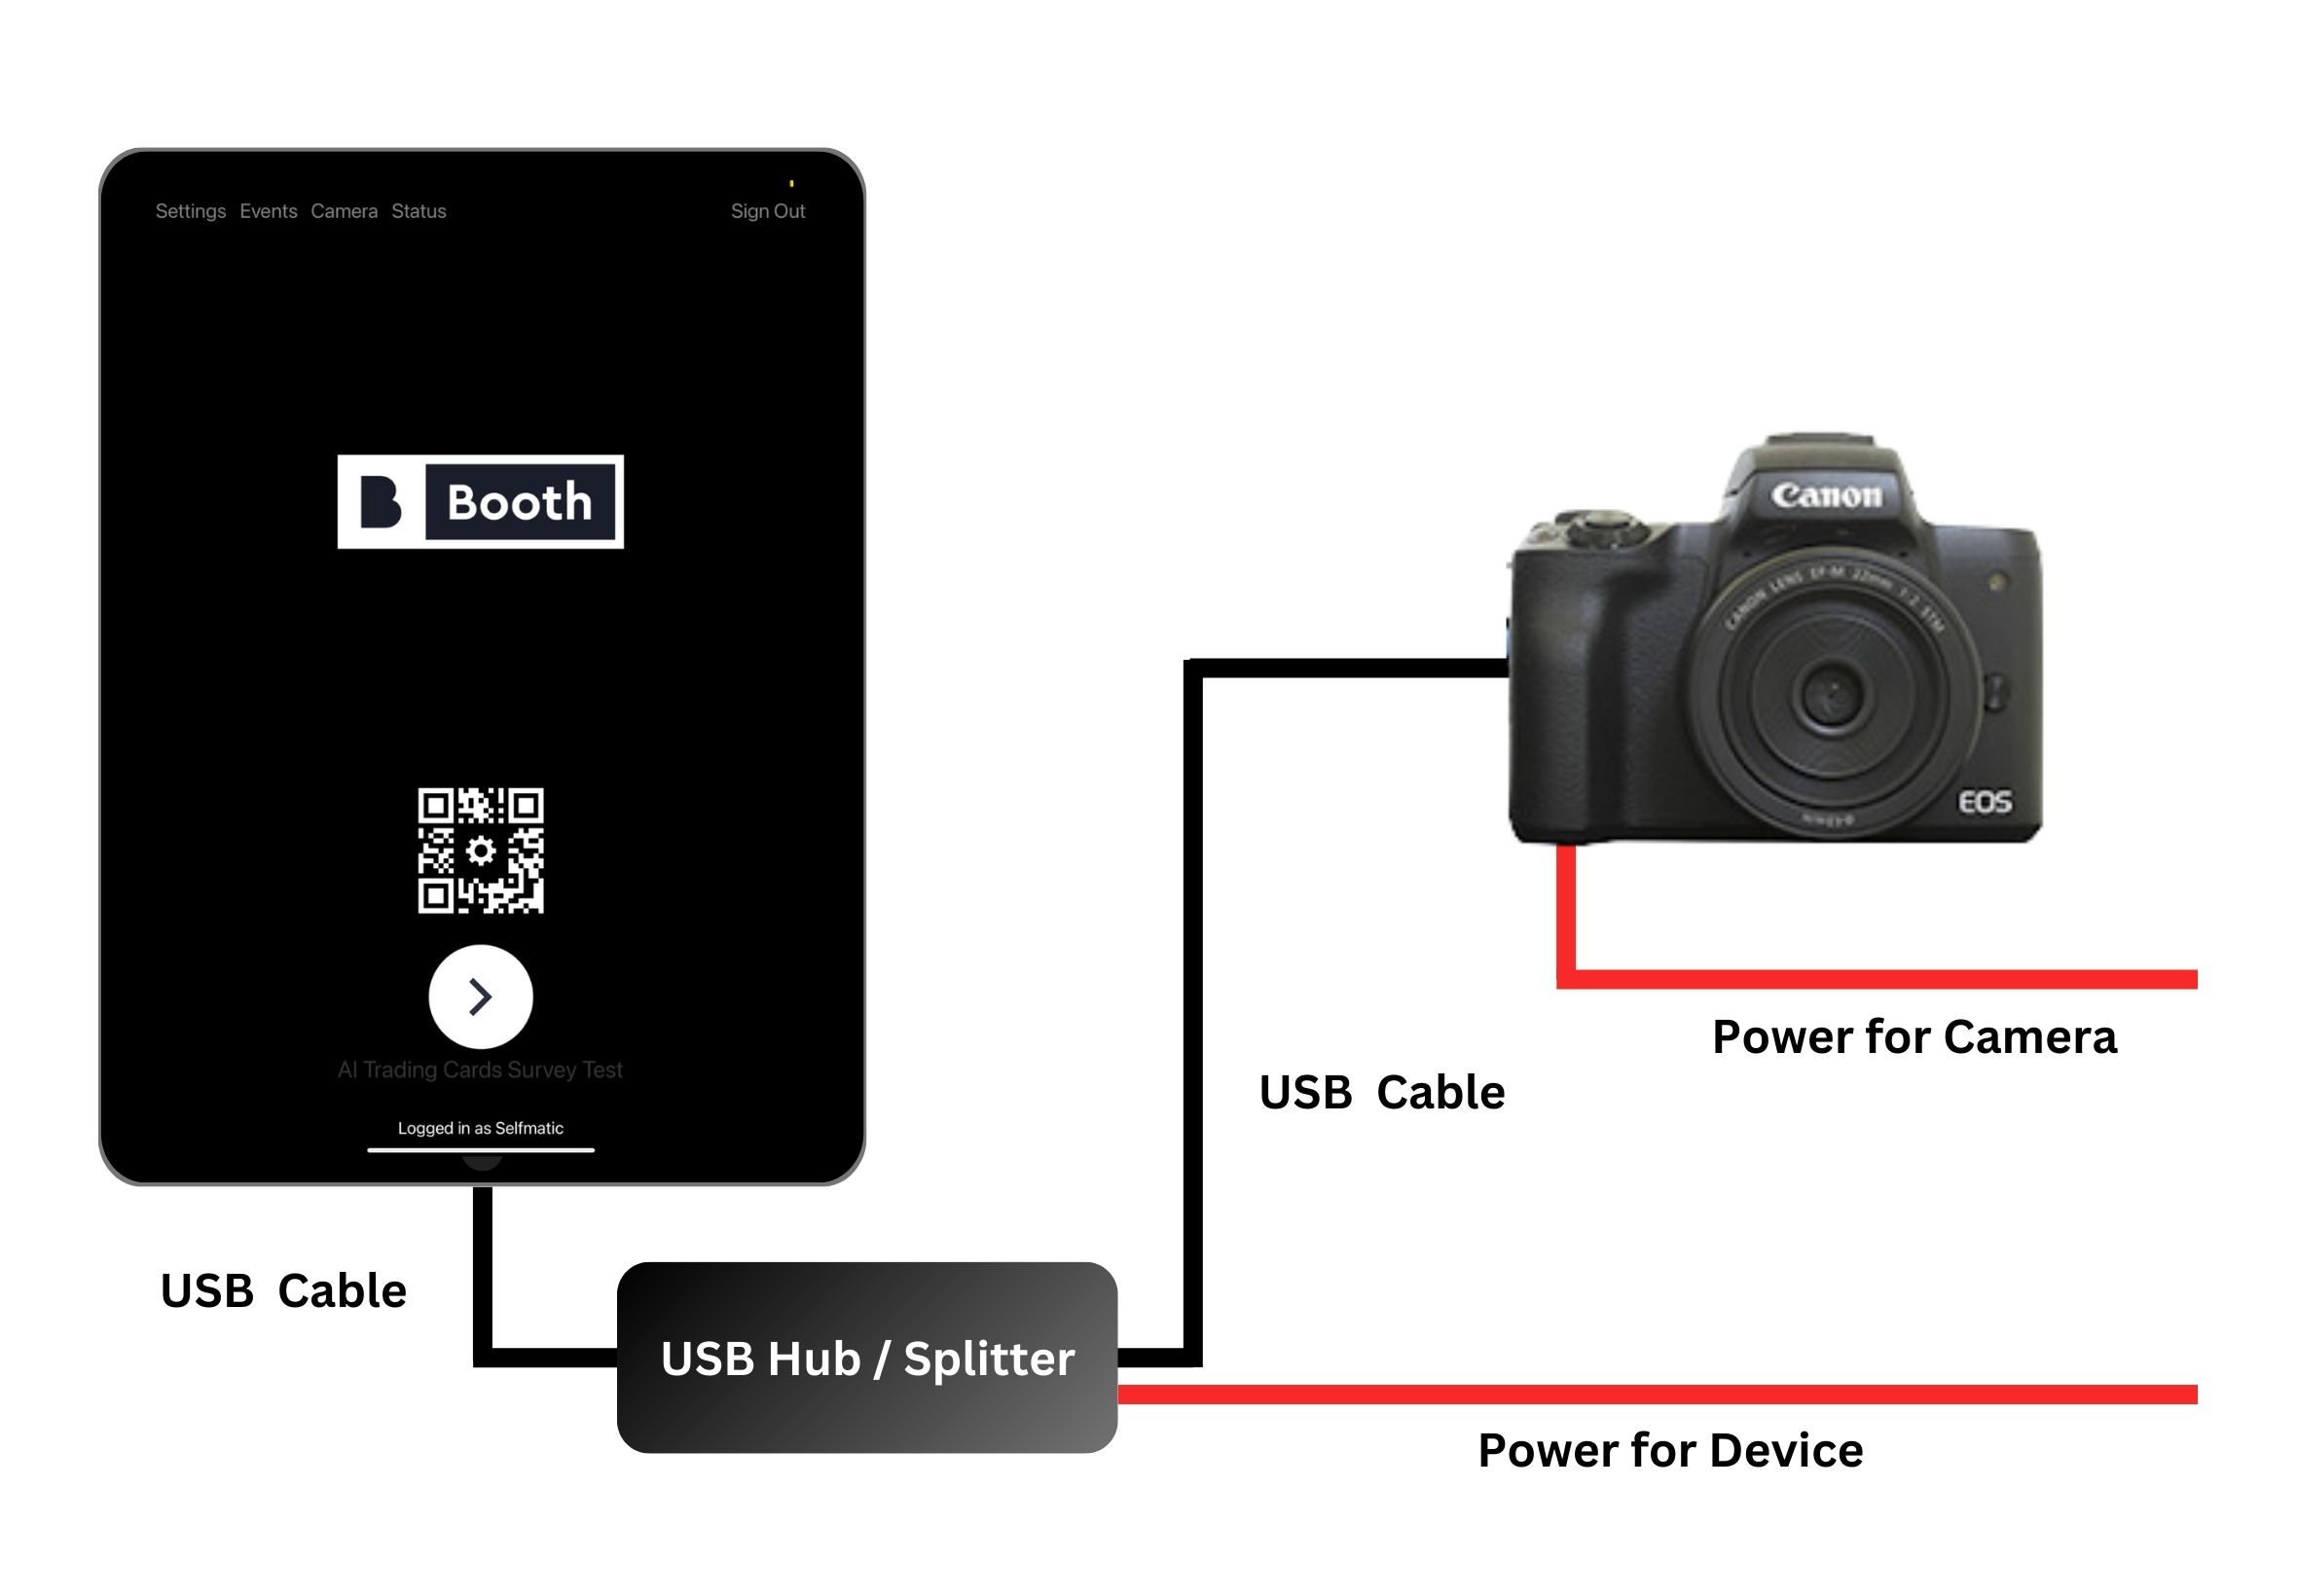
USB C Enabled Device
If you are using a device which has a USB C connection (eg recent iPads and iPhones) you can use a USB C hub or splitter cable to connect everything. It's best to use a Hub or splitter cable that also supports power, so you can keep your device charged whilst in use.
If you do not need to charge your device, you can connect a USB cable directly between the device and the camera without the need for a Hub.
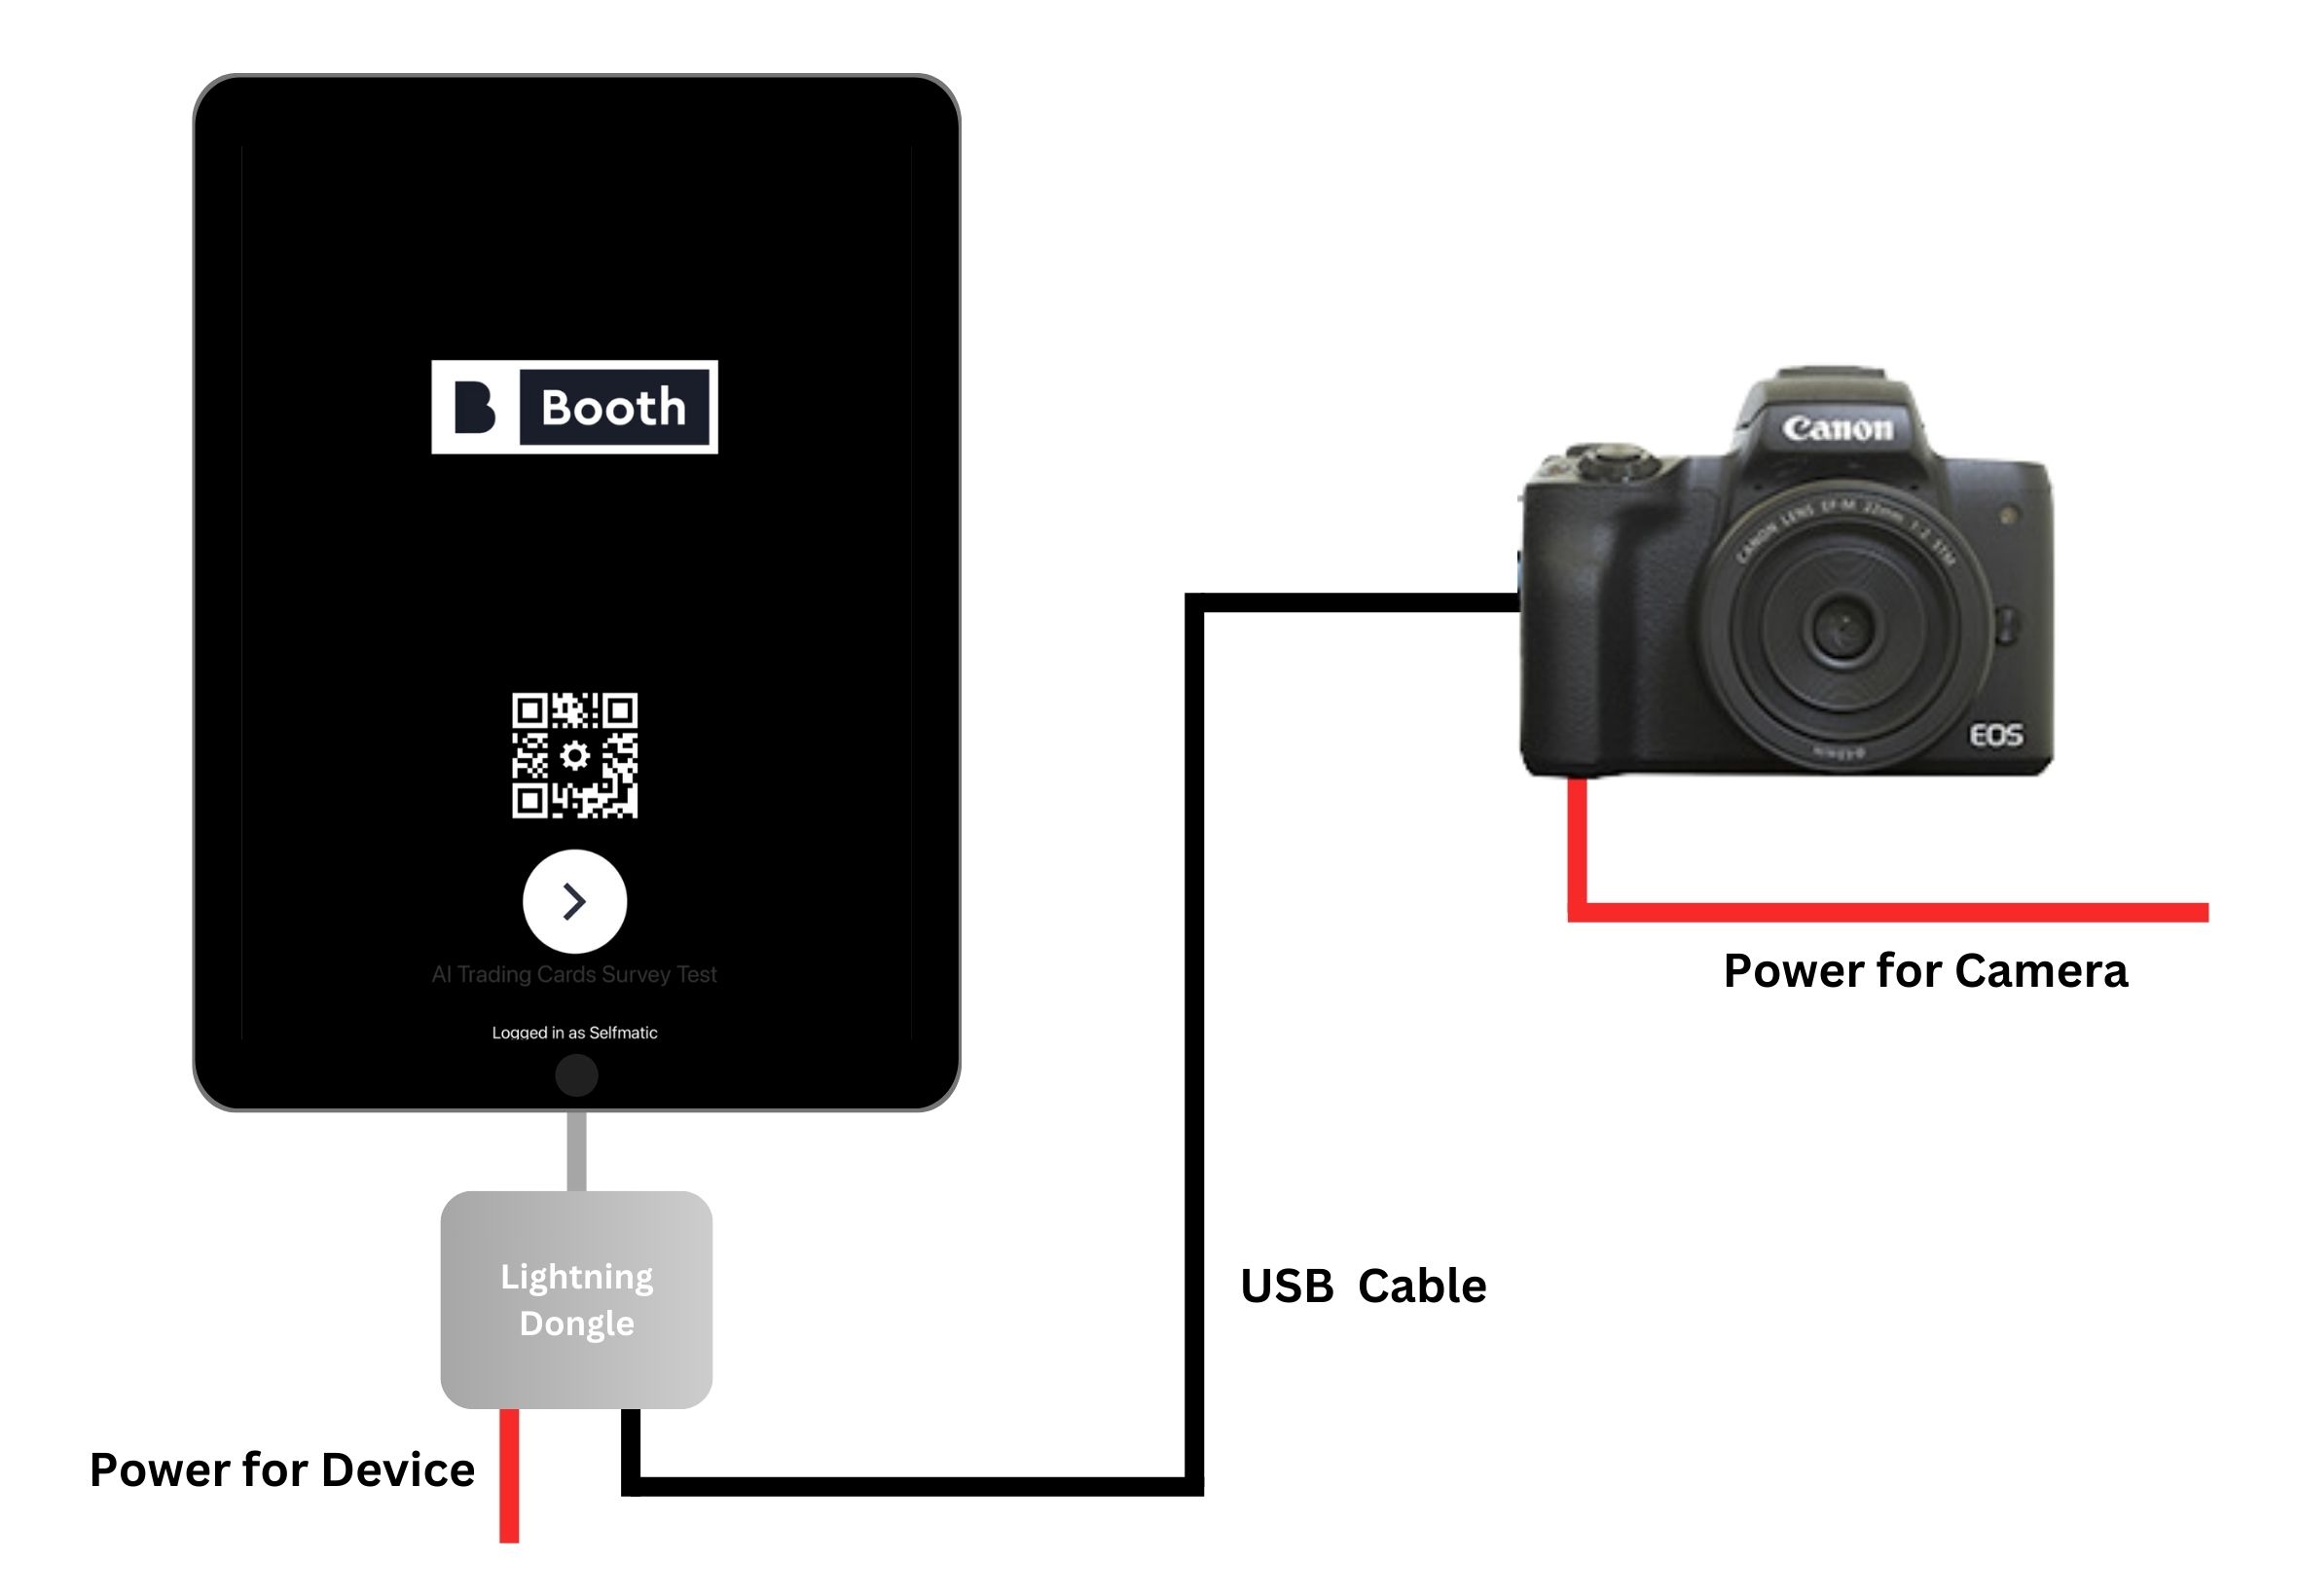
Lightning Enabled Device
If you are using an iPad which has a lightning connector you will need a lightning to USB adapter. It's best to use a lightning to USB adapter that also has a lightning charging port so that you can charge the iPad when using an external camera.
Enabling the Camera
To enable a connection to an external camera click on "Camera" at the top of the start screen in Breeze Booth and then select "External camera". Breeze Booth will then start the process of connecting to the camera:

The camera settings screen will display a graphic showing a camera with a red X if it is not connected to a camera. Connect the camera to the device and turn the camera on.

When the camera is turned on and starting to connect, the graphic will change to a camera with a red bar underneath.

If you have a memory card with images or videos on it, Breeze Booth will scan the card. This may take some time, depending on how many images are on the card. If they are not needed, its always a good idea to format the card before use.
A memory card is only required if shooting video

Once you can see Live View Images, you are connected.
Camera Settings
Rotate Live View
Tap the "Rotate live view" button to rotate the live view images from the external camera if they are not the right way up. The live view is rotated 90 degrees each time the "Rotate live view" button is pressed. The camera orientation does not need to be the same as the iPad e.g. the camera can be in landscape orientation with the iPad in portrait orientation or any other combination.
Photographer Mode
Select "Photographer mode" for roaming photography where a photographer takes the photos and adjusts the exposure settings using the camera's controls. For a fixed photo booth disable photographer mode so that the app can adjust the camera settings.

Photo Settings
The "Photo settings" displays the camera settings that are used when taking photos. Tap on these settings to adjust them and tap the "Test" button to take a test photo:

The optimum camera settings depend upon the type of lighting and the camera model. Set the exposure mode dial to M and the image quality to JPEG not raw or HDR/HEIF. The medium/fine JPEG setting should give good results and will be slightly faster than the large JPEG settings due to smaller file sizes.
Supported Cameras
You can view the full list of supported cameras here.