Processed Photos
What is it?
Think of Processed Photos in the same way you would a print layout - except the layout and design is for the individual image. This means that in addition to the final print layout you can also have branded and resized individual images (not to mention a branded GIF, plus the original images). All of these images can be emailed, or uploaded to galleries such as EventKite.

In this Guide
- Example Image
- Resize the Overall Image
- Resize the Photo
- Processed Photo Placement
- Processed Photo Background
- Processed Photo Overlay
Example Image
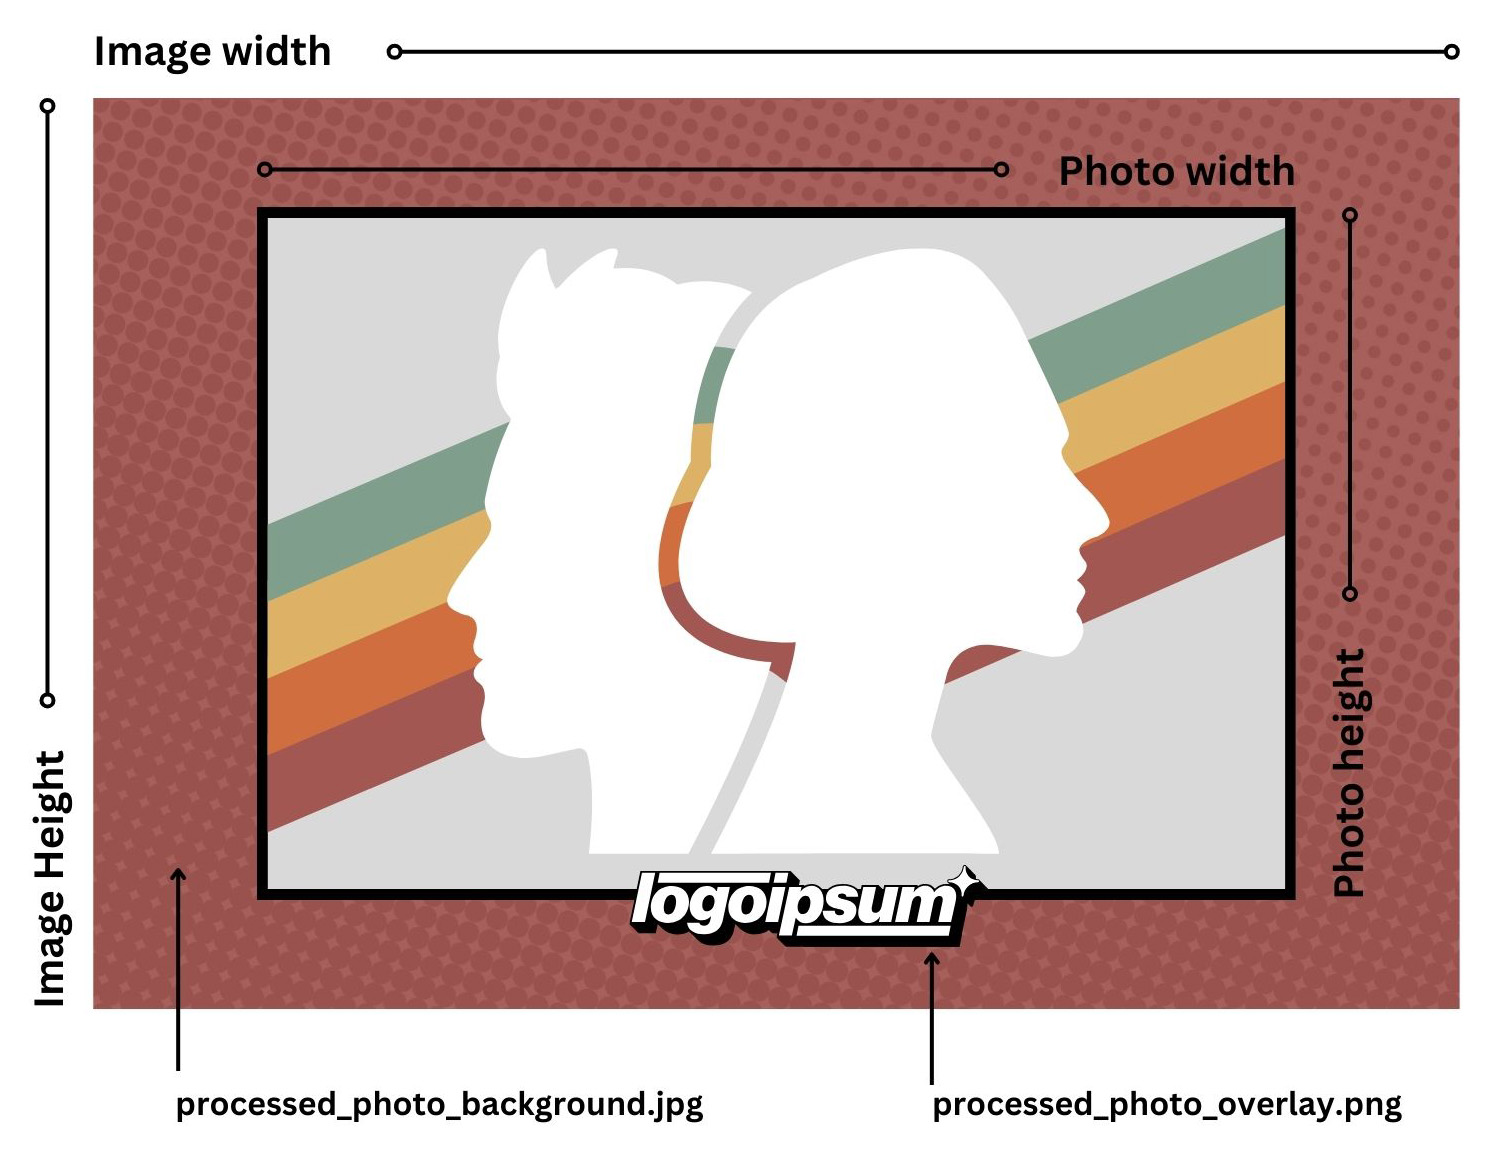
Resize the Overall Image
Set the image width and height to the size of the overall processed image to be saved. Alternatively set the image width and height to 0 to make them the same as the resized photo.
Resize the Photo
Select resize photo and specify the maximum width and height for the photo. The photo will be resized so that it is no larger than the maximum width and height settings e.g. if the photo is 800x600 pixels in size and the maximum width is set to 400 and the maximum height is set to 400 the photo will be resized to 400x300 pixels.
If the maximum width or height is set to 0 the value will be calculated automatically using the photo's aspect ratio e.g. if the photo is 800x600 pixels in size and the maximum width is set to 200 and the maximum height is set to 0 the photo will be resized to 200x150 pixels. Or if the maximum width is set to 0 and the maximum height is set to 450 the photo will be resized to 600x450 pixels.
Processed Photo Placement
Use the photo placement settings to resize the photo and specify where it is placed in the image.
Processed Photo Background Image
A background image can be applied by adding a JPEG image named processed_photo_background.jpg. When placing the processed photo within a larger image or when using AI background removal . The background will be visible behind the photo in the areas that have been removed when using AI background removal or when the image area is larger than the photo.
Processed Photo Overlay Image
An overlay for branding can be applied to the processed photo by adding a PNG image named processed_photo_overlay.png to the screen folder.
Different background and overlay images can be used for each photo by naming them processed_photo_background<n>.jpg and processed_photo_overlay<n>.png respectively, where <n> is 1 for the first photo, 2 for the second etc.
If the background or overlay images are larger than the processed image size they will be resized to fit. If they are smaller than the processed image size they will be centered within the processed image.